Grow Your Own Food
Anyone with a sunny yard, deck or balcony, or even a window box can grow food. There are plenty of easy-to-grow vegetables. Plant only what you like to eat. Be realistic. A 4'X4' garden bed could keep you in salad greens or squash all summer, but it is not enough room to grow corn or pumpkins.
Skagit County has a short growing season. Consider days to harvest/maturity (noted on the seed packet) when selecting what to plant. Also note the spacing recommended on the packet. If plants are too close together, they will steal light and nutrients from each other.
Where
Do you have a spot that gets at least 6 hours of sun each day? Do you really need all that lawn? Consider converting part of your yard into a garden. Gardens and lawns require similar care. They both need good soil, sun and water. Containers can make gardening very flexible. Also, plant some veggies in with your flowers.
When
In the Skagit Valley depending on where you live, March gives us our last hard freeze; however, frosts can be expected through early May. Vegetables that tolerate frost can be planted/transplanted in March and April. May is magic for planting. Check out the Planting Guide extracted from the WSU Extension Bulletin on Home Vegetable Gardening in Washington.
Consider winter gardening too. Carrots, parsnips, leeks, broccoli and kale can be planted in mid-summer and harvested through winter. Don't forget to plant garlic in the fall. It is easy to grow and stores well.
How
Plan your garden. Decide how much and what kind of space you will use. Do you want to plant directly into the ground, raised beds, or containers? Do you just want salad veggies in between flowers?
Do you know what type of soil is in your yard, and what soil deficiencies to expect? There are a number of firms that provide soil testing. There are two locations in Washington. Simply Soil Testing in Burlington and SoilTest Farm Consultants in Moses Lake. The results will provide info on your specific soil nutrients, pH, etc.. The data will guide you in properly amending your soil. Another option - do your own soil test to determine the type of soil in your yard. Check out this video from WSU Soil Scientist, Dr. Craig Cogger on soil texture.
Keep your garden manageable. Raised beds can extend the season and protect plants from rabbits, snails, slugs. Use a cold frame, floating row covers, or tunnels to extend your growing season and protect from insects such as cabbage moths. The options are endless. If your space is small, consider vertical gardening for vining vegetables like cucumbers, pole beans, and some squashes.In order to have salad greens all summer long, plant a few seeds every 2-3 weeks for an ongoing harvest. This is called succession planting.
Growing Food Can Be More Than Vegetables
Herbs
Herbs are easy to grow and attractive in beds or as potted plants. With our mild winters, many herbs are perennials and survive more than one year. Even the ones that are not cold hardy will usually produce late into the fall. Rosemary and thyme, particularly, are typically available year-round. Basil, parsley, cilantro, tarragon, chives, and dill are easy to grow, as well. Consider planting an edible garden close to your kitchen-making it easy to harvest what you need for a meal.
Small Fruits and Vines
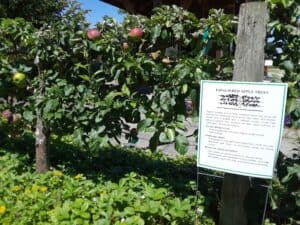
If you have the room, there are plenty of berries, small fruits, and fruit trees that do well in the PNW. Check out the WSU Extension Bulletin on Growing Small Fruits in the Home Garden.
If you don't have a lot of extra space, try columnar apples or grow a grape vine on a pergola. Remember to plant flowers to attract pollinators for a better harvest.
Types of Gardens
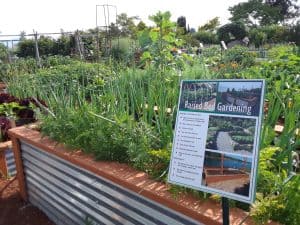
There are many types of gardens. For limited space, you might want to try a container, raised bed, or vertical garden.
You might want to plant an organic garden, in which you use no synthetic fertilizers, herbicides or pesticides. You can extend the growing season by using a greenhouse, hoop houses, cold frames, and tunnels. Check out the Garden Construction section of Gardening in Washington State for more ideas.
Problems?
Visit a Plant Clinic
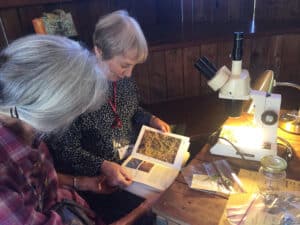
Let the Master Gardeners provide science based recommendations for your gardening problems.
Ask a Master Gardener Booths
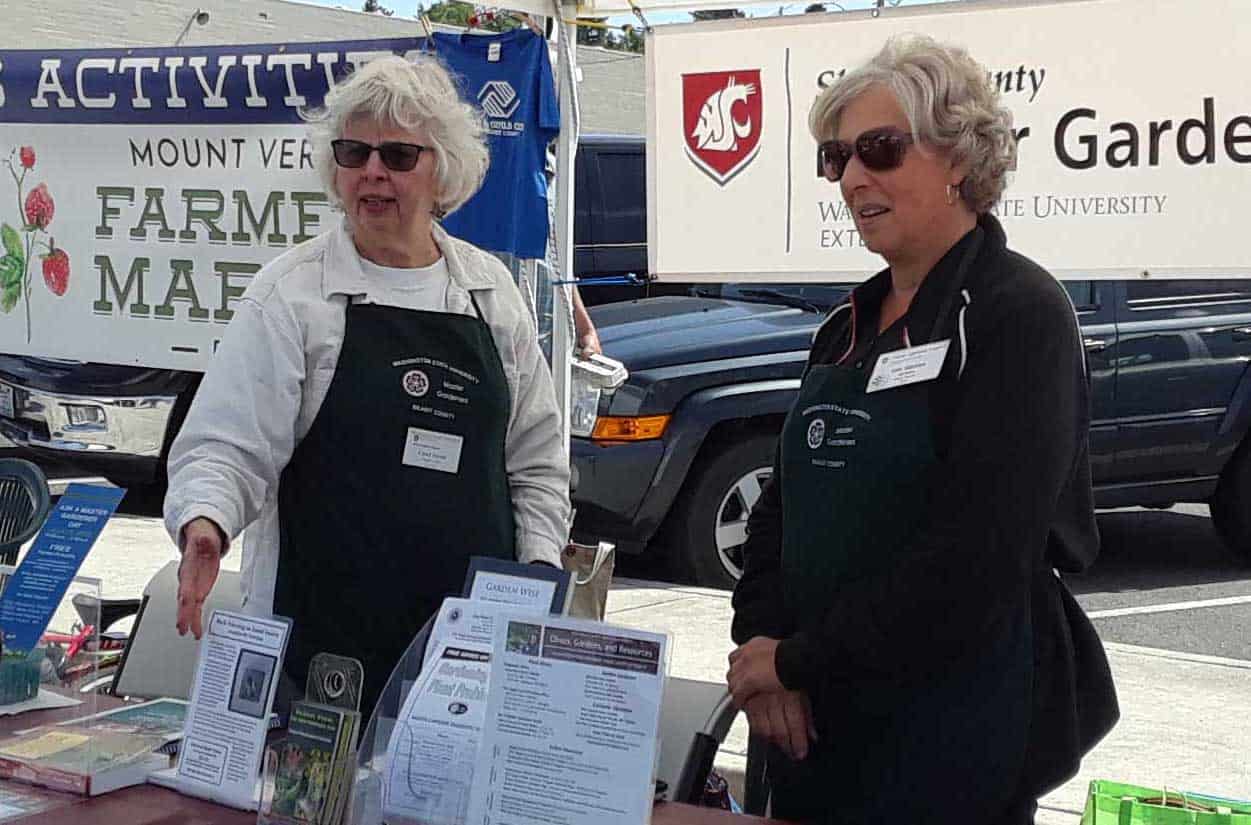
Visit us at Skagit County Farmers Markets for assistance with plants, trees, landscaping, and pests. Check the events page for dates and times!
Publication Library
.gif)

Step by Step
Growing Vegetables and Tomatoes in the Pacific Northwest

Seed Selection
Before choosing vegetables for your garden, you want to make sure what you plant will do well in the Pacific Northwest. Our short summers make certain crops unrealistic for most gardeners. It is essential for the crop that you plant to have an opportunity to mature before the cool nights of fall arrive. Most seed packets provide a lot of important information. Some seed catalogues include gardening guides.
Days to Harvest/Maturity
Days to harvest/maturity is roughly how long after planting before you can expect ripe fruit.
Growing Days
All days are not created equal for growing plants. Your goal in starting plants indoors is to maximize the available growing season. Growing Degree Days (GDD) are days that met or exceed a base temperature where the plants receives adequate warmth for tissue growth. Base temperatures vary by crop type. Wheat requires less warmth to grow than a tomato. The base temperature for warm season crops such as tomatoes and peppers is 50 °F. GDD is calculated by subtracting the base temperature (50 °F in this case) from the average daily temperature (add the high and the low temperature for the day and divide by two). If the resulting value is less than 0, then it is set to 0. GDD units are always positive. If it is above 50, it is a GDD. If a seed packet lists 60 days to harvest/maturity, you will need 60 GDD for that plant to produce ripe fruit. Regional GDD data is maintained for growers to estimate when to plant based on historical averages. Sign up with WSU Ag Weather to find GDD data for your area.
Planting
Carefully read the back of your seed packet for planting information (how deep to plant seeds, how far apart, when they can be planted, fertilization needs, water needs, etc.). Some vegetables such as lettuce, carrots, radishes, and kale can be planted directly into the soil, but others (like tomatoes, peppers, and squash) need to be started indoors, or bought as seedlings to give them a jump start on our short growing season.
Vegetables that do well in the Pacific Northwest
Easy-to-Grow
- Leaf lettuce, spinach, micro-greens, kale....too many varieties to count. These veggies enjoy a very short time from sowing to harvest and can tolerate some shade. Select mature leaves for harvest and let the plant keep producing.
- Peas (shelling, snap and snow), and bush beans can take up a lot of room. However, the climbing varieties of peas, and pole beans, take far less space and are easy to grow if you have a fence or trellis that they can climb on.
- Onions, leeks, garlic, and radishes are usually disease-free and pest resistant. Radishes can be scattered among other plants. Ideally garlic should be planted in October for harvest in July.
- Rhubarb and artichoke are perennials that are easy to grow.
- Cucumbers are available in vines or bunching varieties. They are generally pest resistant and one or two plants can produce cucumbers for months.
- Summer squash, such as zucchini, yellow crookneck and patty pan produce well and should be picked as soon as they are large enough to eat for an ongoing harvest. Space saving bush varieties are available.
- Corn, pumpkins, winter squash, and potatoes all grow well in the PNW but need a lot of space.
- Beets, turnips, and kohlrabi are susceptible to some pests and diseases but are generally easy to grow.
- Tomatillos are easier to grow than tomatoes; one plant will produce an abundance of fruits.
More Challenging
- Carrots and parsnips are difficult to germinate, require thinning, and take a long time to grow, but they are far sweeter than those bought in the grocery store.
- Tomatoes are sought after by most gardeners, but even the determinate bush varieties need a lot of space. The challenge with tomatoes is that they need lots of sun and heat for the fruit to mature and sweeten to that wonderful taste that we all crave—but this challenge can be overcome! Skagit County WSU Extension Master Gardeners have made an art of it, and you can too! Judy Callahan, a long time Master Gardener, says the first rule of growing tomatoes in the PNW is "not to grow tomatoes!" However, Judy, like so many other gardeners, overcomes the challenges to successfully grow tomatoes every year.
- Peppers, like tomatoes, need full sun and heat. Hot peppers mature faster and do better in the PNW than the sweeter varieties.
- Eggplant is a relative of tomatoes and peppers and requires summer heat; however, they don't take up a lot of space.
- Broccoli, cabbage, and brussel sprouts grow well here but the leaves are prone to pest problems. Broccoli and cabbage also need a lot of space.
- Bulb fennel can be difficult to get started, but grows easily once the shoots emerge—and it’s delicious!
Fall Garden
- Asparagus, red kale, corn salad, garlic and leeks
Can't decide what to plant? Plant what you like to eat!
There are many varieties of tomatoes to suit almost every taste and growing condition. When selecting a variety, look at the following:
Days to Harvest/Days to Maturity
Days to harvest is roughly how long before you can expect ripe fruit. Days to maturity can also be a guide to distinguish varieties as early (65 days or less), mid-season (65 to 80 days) and late-season (80 days or more). For the Pacific Northwest, gardeners should mostly look at early varieties unless they have a greenhouse.
Determinate or Indeterminate
Determinate varieties of tomatoes produce many short branches with flowers and fruit on the ends. They are usually early varieties and the fruit generally ripens at the same time. These smaller plants are ideal for patio pots and small greenhouses. Indeterminate varieties continue to grow and produce flowers and fruit all season. The vines can grow over 25 feet in optimal conditions and will need support from stakes or cages. Semi-determinate plants are more compact than indeterminate, but keep producing until frost.
Disease Resistance
Resistance to diseases is important to consider. Many variety names are followed by one or more letters. For example, Verticillium wilt is "V" and Fusarium wilt is "F".
How to choose?
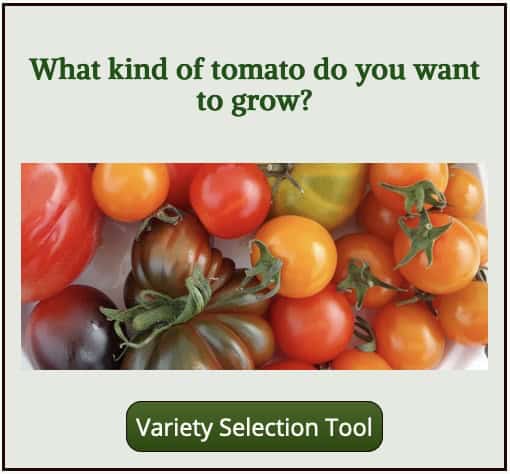
Tomato fruit can range in size from small cherry tomatoes to fruits to as large as grapefruit. Many colors are available. How you will use the tomatoes? Are you looking for slicing tomatoes or salad tomatoes? There are low moisture, low seed varieties suited for canning or drying. Heirloom or heritage tomatoes are traditional non-hybridized varieties. Use the Variety Selection Tool to check out some varieties.
Resources for Growing Tomatoes in Northern Climates
Three most common tomato problems: Blossom End Rot, Anthracnose, and Late Blight. Get help from the Plant Clinic.
University of New Hampshire Extension - Tomato Fact Sheet
University of Minnesota Extension - Tomatoes
WSU Hortsence - Tomato Diseases
Clemson University Tomato Disorders
University of Minnesota Extension - Tomato Problems
Iowa State University - Tomato Diseases and Disorders
University of Arizona Plant Nutrient Deficiencies
How Many Seeds to Start
Think about how may plants you need and your garden space. Most gardeners tend to over plant. It is better to plant fewer starts and pay closer attention to them. Less plants per square foot allow more air circulation and sunlight to the leaves. Once you have determined how many plants you want, plant about 10% more seeds than the number you desire. Remember you can thin them or give away extras.
When to Plant
Due to the short growing season in Western Washington, Master Gardeners recommend that you plant seeds indoors on heat mats in March. This will result in plants 8 weeks old by the last frost in May. Some areas of Skagit Valley vary slightly due to micro-climates, so experiment to see what works for you. If you want to know your frost dates, got to the WSU AgWeatherNet.
Prepare Starting Media
Moisten fertilizer free seed starting mix with warm water to make it usable. Make sure to add a little water at a time and mix thoroughly.
Germination Container
Some seeds, such as corn, are best sowed directly in the ground; however, starting seeds in containers indoors helps jump start the season. As long your seeds get sufficient moisture and warmth, almost any container will work for germination. Plant protector trays, butter tubs, clam shell food containers, etc. Previously used containers should be sterilized with a light bleach solution (5%). If you are growing small numbers of a variety of plants you might want to plant directly into 6-pack cells or small individual pots designed for seed starting.
Planting the Seeds
Fill the container with 3/4” of the pre-moistened seed starter mix (or potting media if you are using individual containers). Sprinkle the seeds on top. Then dust the surface with additional media to cover the seeds. Gently water with spray bottle until the media is moist. Tightly close the lid or place the container in a plastic bag to retain moisture. Label the container with the variety of seed and date planted. Do not let the seedlings dry out. Keep the soil moist to very moist. Heat mats are great. No lights are needed at this stage, just warmth. It is ok for them to be in the dark.
Germination
Your seeds will germinate in 4 to 10 days. Check them daily. When the first seeds sprout, remove the covering and return the container to the heat mat. Add artificial light 14-16 hours/day. Keep lights continually adjusted 2-3 inches above the plants or as per the instructions for grow lights. Water with a spray bottle to keep soil moist to very moist. Soil can dry out quickly on a heat mat. Do not let the seedlings dry out but don't over water. A small fan provides good ventilation and the motion helps strengthen the stems.
If you are growing your starts inside, check out our Blog article on Indoor Grow Stands for lighting details.
Transplanting into 6 Packs
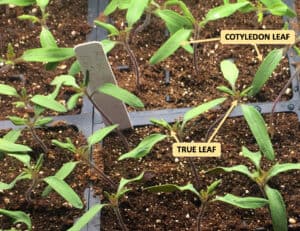 Seedlings are ready to transplant to 6 pack plug trays any time after the first cotyledon leaves have unfolded up until when the first true leaves fully emerge. This will be as early as 5 days or up to 3 weeks. It is easier to untangle the roots of smaller plants, and you want to give the roots room to grow as soon as possible.
Fill 6 pack containers with seed starter mix. Poke a hole in the center of each plug using a chop stick or pencil. Carefully pull seedlings from the dish by their small leaves untangling the roots, if necessary, with a plastic fork or your fingers.  DO NOT pull the seedling out by the stem as it is delicate and can cause disease if bruised or otherwise compromised. Remember to label your plants each time you transplant them.
Plugs need light, heat and a low nitrogen fertilizer. Water with water soluble 12-31-14 fertilizer (1 tsp/gal) at each watering. Keep the soil moist but not wet. Tomatoes love warm water! Be creative to keep your seedlings 2-3 inches under low intensity lights for 14-16 hours/day. If the light is not adequate, you will get long, leggy stems shooting up.
Transplant to 4" Pots
Transplant when the roots are visible at the bottom or sides of the plug. This will take about 7 days to 2 weeks. Fill your 4 inch pots with a mixture of 5 parts potting soil and 3 parts perlite. To remove the plants from the 6 pack containers, gently squeeze the bottom of each cell of the container or scoop out the contents with a teaspoon. If that doesn’t work, take a pair of scissors and cut lengthwise down each cell. This will make it easy to remove the plug.
Prepare the 4" pot by making a hole with a dibble or other object (chop stick or pencil) and drop in the plug. Plant the seedlings to the lowest leaves. You can pinch off the cotyledon leaves to bury the plants slightly deeper. Water gently with a spray or squeeze bottle. Do not let plugs dry out or over water. Slightly moist is perfect.
Transplanting to Gallon Pots
When are the starts ready for gallon pots? If you are past your average last frost date, you may be able to skip this step and plant outside. Otherwise, it’s time to transfer your plants from 4" pots to gallon pots when the roots reach the sides or bottom of the 4" pot. Continue to use a mixture of 5 parts potting soil and 3 parts perlite. Rough up the root ball and bury as much of the plant stem as is reasonable. The stem, when buried, will develop roots and make for a more vigorous plant. Water with a water soluble 17-17-17 fertilizer (1 tsp/gal) at each watering.
Caring for your plants until the last frost
Unheated Greenhouse
If weather permits, your plants will thrive in an unheated greenhouse, 40-75 degrees F. At this stage, they no longer need a heat mat. However, if the weather remains cloudy, you may need to continue artificial lighting. If the temperature drops, you can use a small heater and/or cover the trays with a plastic dome lid at night. Water carefully and leave a fan on.
Basement or Garage
Be creative to duplicate greenhouse requirements. Find a spot where the temperature is 40-75 degrees. Continue artificial lighting for 14-16 hours/day. Use a heat mat if location is under 50 degrees at any time.
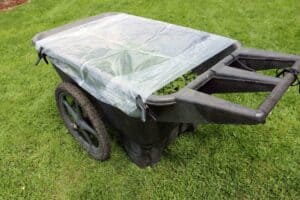
Plants that have been grown in protected environments (this includes most store bought plants and those purchased at the Master Gardeners Plant Fair in May) are tender and need to be properly acclimated before planting outdoors. Two weeks before transplanting, start setting plants outdoors for a few hours each day to acclimate them gradually to outdoor conditions. Protect them from rain and wind. Leave them out a little longer each day. Keep an eye on the soil moisture. Be careful how long you leave them out on sunny days as they can get sun burn.
Continue to bring plants in at night until night time temperatures are above 50°F. Chilled tomato plants will be more likely to get catfacing or other physiological problems.
Be creative, give the tomatoes as much sun as possible.
Keep them dry and warm at night.
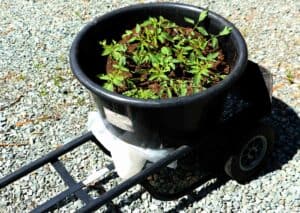
Improvise your own hardening cart.
Skagit, we've had a problem!
If NASA can grow vegetables in space then how hard can it be?
Read more about NASA's space garden. Even the astronauts use the "cut and come again" technique for harvesting the outer salad green leaves while the plants keep growing.

Take a self-guided journey through local gardens, family-owned farms, markets, bakeries, eateries, and artisanal producers.
![]()